Introduction to Graphical Zest In Owasp Zap Proxy (Part 2)

Introduction to Graphical Zest In Owasp Zap Proxy (Part 2)

String Loops

Let’s now take a look at what kind of loops is possible in Zest. A basic one is a string loop where we loop through a series of strings. We can add in a string loop using the following menu option.

You will get this dialog box where you will key in a string for each line. For each loop, the variable tempString will be assigned the string on each line. 

Click on the Save button and you will see the loop added to the script. 

What we want to do next is to print out the tempString variable so we add in a Zest print action using the menu option below.

We get the dialog box below and we put in the message to be printed out with a reference to the tempString variable.

We save the dialog box and we run the script and you can see that it looped 3 times and printed out the a different string each time.

Integer Loops

We can also do the same for integer loops using the menu options below.

You will get a dialog box below which we will key in the variable name tempInt and we want to loop 3 times.

Click on the Save button and we do the same thing as we did before for the string loop, we add in a print statement.

We get the dialog box below and we put in the message to be printed out with a reference to the tempInt variable.

We save the dialog box and we run the script and you can see that it looped 3 times and printed out the a different integer value each time.

Variable Assignment

There are many ways you can assign values to variables as you can see from the screenshot below. 

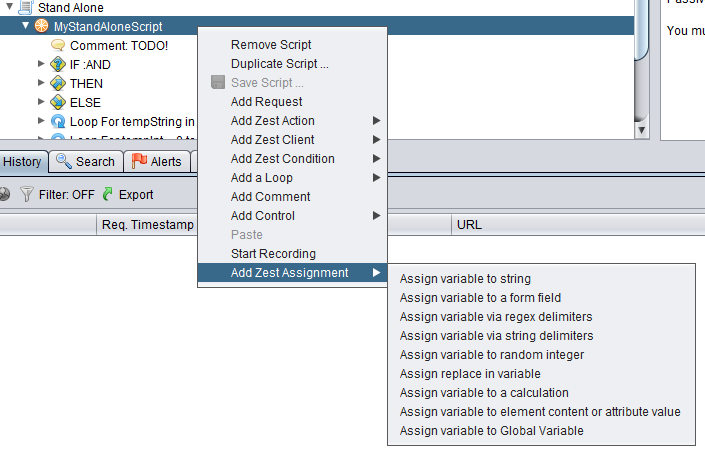
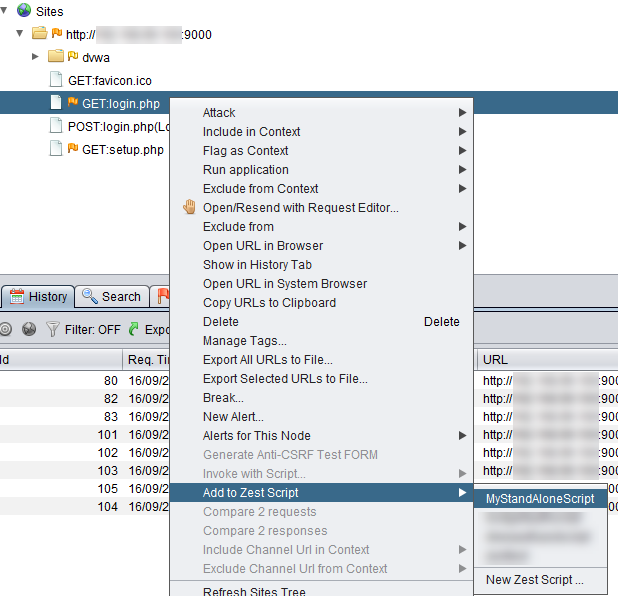
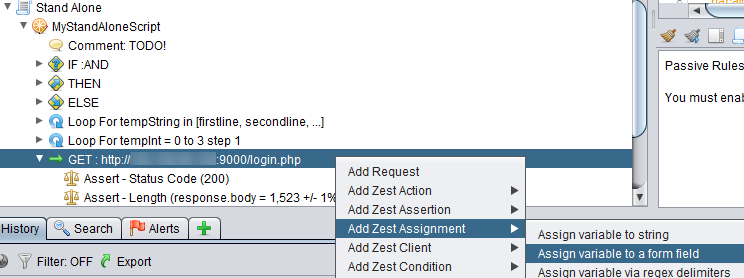
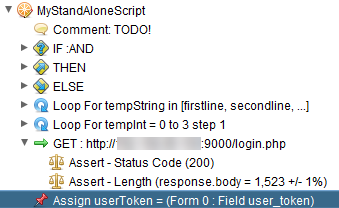
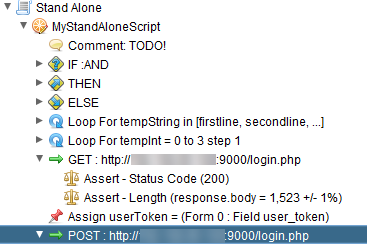
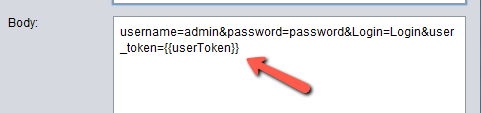
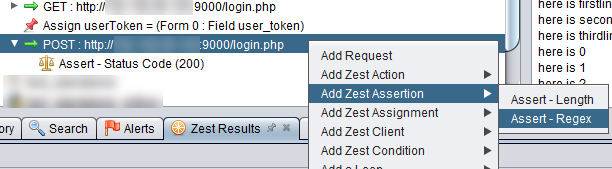
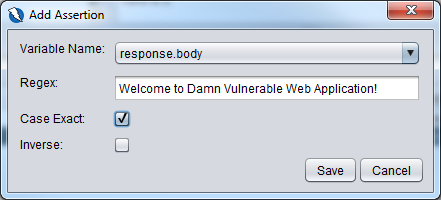
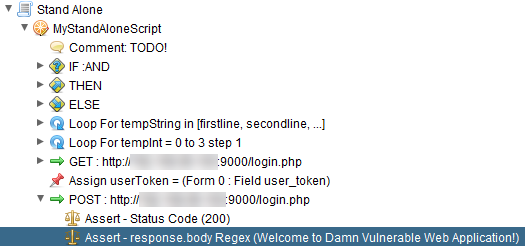
We reference these variables in our script the same way we reference our input variables: {{variable_name}}. I believe you can try them out on your own but there is one variable assignment example I would like to point out is the Assign variable to a form field. This menu option allows you to assign the value of a form field in a response body to a variable. This is highly useful when when the form uses a csrf token. Let’s see this action on while we are doing that we can also see how we can add requests to our zest script instead of doing it manually.

Assuming you already have DVWA application running even before the DVWA application is initialized, let’s launch Firefox from Zap.

Access the DVWA url and login. Take note that the login screen form contains a csrf token which we are going to assign to a variable and use that in the subsequent POST login request. You can right click on the web page and view the source to see the csrf token. When you go back to Zap, you will find that the Site tree is populated with the http requests to GET the login page and POST it when you logged in.

Right click on the GET login.php row as shown below.

You will get switched to the Scripts tab and you will see that the GET request got added to the Zest script.

You can delete the assert statements if you don’t need them. They serve to help you test your Zest script to ensure the script is working as you expect. Now we want to get the csrf token value assigned to a variable so we choose the menu option shown below.

You will then see the dialog box show up and you will notice that the form input elements have already been detected and populated by Zap in the drop down list and the user_token input element is the csrf token (red arrow). We assign the value of the csrf token to a variable called userToken. Click on the Save button.

After that, you will see the variable assignment of the csrf token entry in the Zest script.

Next we go back to the Sites tab and add the POST login request to the Zest script as shown below.

It gets added to your Zest script as shown below.

Double click on the POST http request entry in the Zest script and you should see the dialog box below. This screen shows the actual request that went through when you logged into DVWA. Notice that there is an actual value to the user_token.

We will need to insert our userToken variable here so that we are populating the csrf token dynamically.

Save the dialog box and also change the assert of the status code from 302 to 200. Reason being is that when Zap is recording your actions in Firefox, after a successful login, DVWA returns a redirect (302) but the Zest script will do the auto redirect for you so that’s why we do an assertion on 200 instead.

We can delete the assertion of the response length. We don’t need it for this demonstration.

Now, run the script and you should see a new tab called Zest Results that will contain the results of your assertions.

You can right click on the POST request and compare the original response we got when we used Firefox and the one that the Zest script got.

You can see on the right hand side that the response coming back from the POST request is the logged in page of DVWA. Note also a failed login can also return back a http status code of 200 as the login page is returned back for the user to login again. So a new assertion needs to be added to the POST request. 

We right click on the POST request to add in an assertion as shown below.

A dialog box will appear as shown below and we use Welcome to Damn Vulnerable Web Application! to detect if we have logged in successfully and we made sure that it was case sensitive. 

We save the dialog box and we should see a new assert as shown below.

Re-run the Zest script again and you should see the assertions passing.

Leave a Comment

Your email address will not be published. Required fields are marked *