A Gentle Introduction to ZAP Scripts (Part 1)

A Gentle Introduction to ZAP Scripts (Part 1)

In this blog post, we take a look at the types of scripts that ZAP offers, what you can do with them and when. This will not cover the HUD scripts which run outside of ZAP.

Prerequisites:

  • Java 1.8
  • Owasp Zap 2.10 (with all available plugins installed, so that we can get the full list of type of scripts available)
Another good reference on ZAP scripts can also be found here – https://www.youtube.com/watch?v=ujL6rH6nVXI
After you launch Zap, you should see the list of categories of scripts below:

Active Rules Scripts​

Active rules scripts allow you to write your own attacks in addition to the ones here – https://www.zaproxy.org/docs/desktop/addons/active-scan-rules/ when the existing active rules are not sufficient for your needs or you want to customize an attack for your application.

You can write an attack at the node level, which is an entry in the Site tree in the scanNode() function or an attack at the query parameter level of the url using the scan() function but both functions must be defined whether they are used or not even when they are defined under 2 separate Java interfaces.

To find out more of the function(s) and their argument(s), you can look at the Java script interface:
https://github.com/zaproxy/zaproxy/blob/develop/zap/src/main/java/org/zaproxy/zap/extension/ascan/ActiveScript.java
or 
https://github.com/zaproxy/zaproxy/blob/develop/zap/src/main/java/org/zaproxy/zap/extension/ascan/ActiveScript2.java

These scripts are executed as part of an active scan triggered by either context menu (shown below)

Or through the history tab

Or through the Active Scan tab below:

Do not forget to enable the script for it to be used.

Authentication Scripts

Authentication scripts allow you to customize the login process for your application. You can learn more about authentication scripting here .
They are specified in the Authentication section of the Context. 
To find out more of the function(s) and their argument(s), you can look at the Java script interface:
https://github.com/zaproxy/zaproxy/blob/main/zap/src/main/java/org/zaproxy/zap/authentication/ScriptBasedAuthenticationMethodType.java#L860
or
https://github.com/zaproxy/zaproxy/blob/main/zap/src/main/java/org/zaproxy/zap/authentication/ScriptBasedAuthenticationMethodType.java#L840

They are executed as part of spidering process and it also depends on how you configure the authentication verification.

Encode/Decode Scripts

Encode/decode scripts that allow you to write your own encoding and decoding methods when the existing methods (red box) are not useful for your needs.
To find out more of the function(s) and their arguments, you can look at the Java script interface:
https://github.com/zaproxy/zap-extensions/blob/master/addOns/encoder/src/main/java/org/zaproxy/addon/encoder/processors/script/EncodeDecodeScript.java

You can access the dialog box above via the memu option shown below:

After you have created your encode/decode script 

and enabled it as shown below.

Click on the button pointed by the arrow to add a new panel under the Encode tab.

You can name the panel and you will see your script in the list.

After you click OK, you will see a new panel under the Encode tab.

You can also access this functionality in the Fuzz dialog box. Look at Fuzzer Http Processor section below to see how to access the Fuzz dialog box.

Same thing with the request/response tab.

Extender Scripts​

Extender scripts allow us to extend functionality of ZAP. If there is a functionality that you want to build into zap and make it as a popup menu item or to modify the behavior of some internal data structures in zap, you can do so using Extender scripts but it also means that you need to understand the Java classes of ZAP. They also get executed when you enable them and they are initialized when ZAP starts up.

To find out more of the function(s) and their argument(s), you can look at the Java script interface:
https://github.com/zaproxy/zaproxy/blob/main/zap/src/main/java/org/zaproxy/zap/extension/script/ExtensionScript.java

Let’s take a look at an example below. Copy as curl command menu.js is already enabled but what does it do?

If you right click on a node in the Site Tree, you will find the menu item (pointed by red arrow). 

What the script does is that it extends ZAP functionality by adding a context menu item so that the user can create a curl command from the node of the Site tree or even from the History tab (below).

Fuzzer Http Processors​

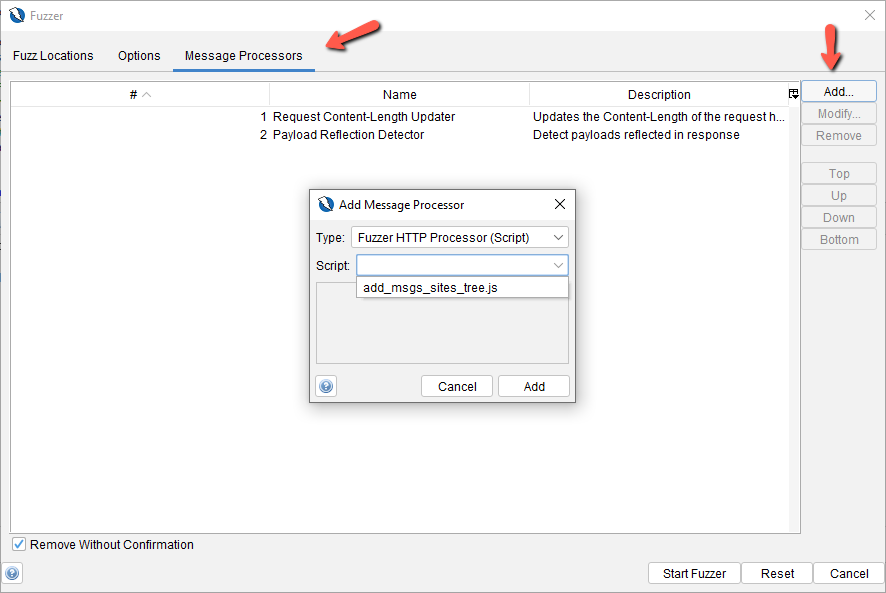
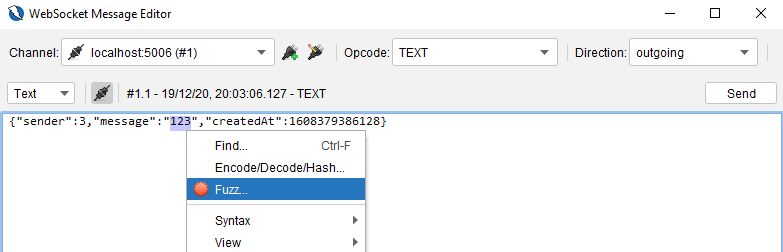
Fuzzer http processor scripts allow you to do some processing of the message that is already modified with the payload that was selected in the locations tab (look at payload generator section) before the message get’s sent out or processing of the server response just before we make it available for viewing in the UI.

When we want to do additional processing of the message besides having the message being fuzzed before they are sent out, like adding an additional header or additional processing of the response before displaying the results to the user.

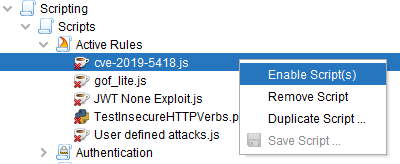
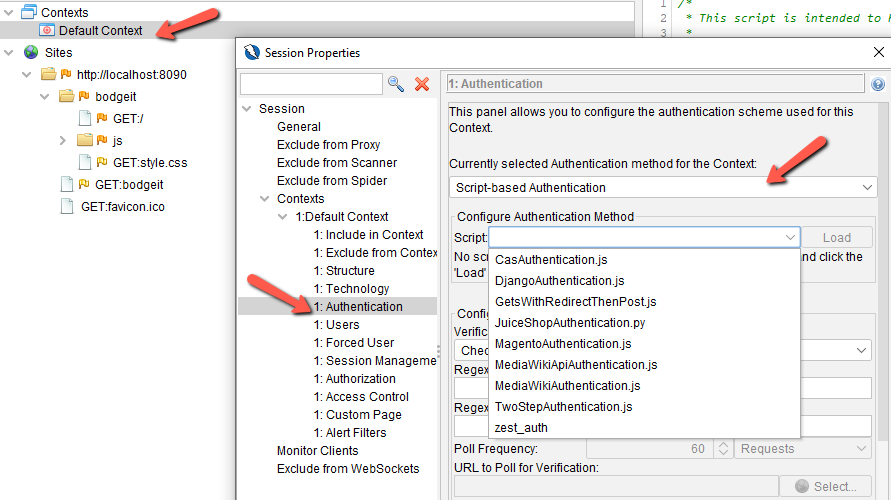
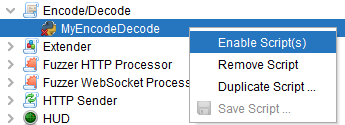
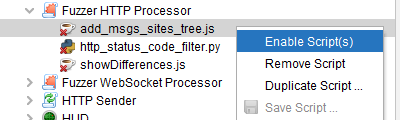
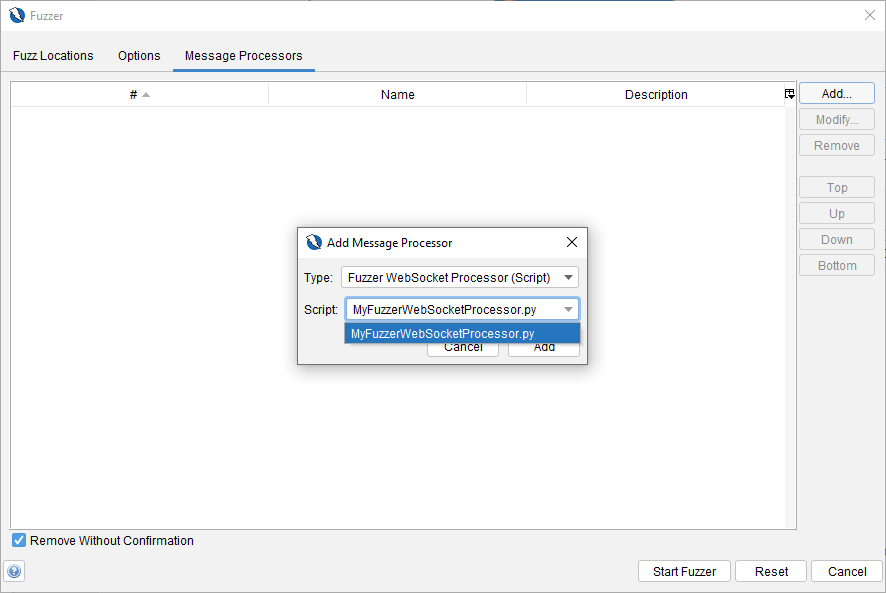
Do not forget to enable the script first.

To find out more of the function(s) and their argument(s), you can look at the Java script interface: https://github.com/zaproxy/zap-extensions/blob/master/addOns/fuzz/src/main/java/org/zaproxy/zap/extension/fuzz/httpfuzzer/HttpFuzzerMessageProcessor.java

We can specify which scripts get executed when we run a fuzz job via site tree or under the history tab.

Once you are at the Fuzzer dialog box, go to the Message Processors tab and click on the Add button. Select the script from the drop down list and click on Add button.

The first 2 processors are inbuilt in Zap. You can remove them if need be.

Fuzzer WebSocket Processor

What is a websocket? A WebSocket is a persistent connection between a client and server. WebSockets provide a bidirectional, full-duplex communications channel that operates over HTTP through a single TCP/IP socket connection. Fuzzer WebSocker Processor scripts serve the same function as Fuzzer Http Processor (above). 

To find out more of the function(s) and their argument(s), you can look at the Java script interface: https://github.com/zaproxy/zap-extensions/blob/master/addOns/websocket/src/main/java/org/zaproxy/zap/extension/websocket/fuzz/processors/WebSocketFuzzerProcessorScript.java

You can specify the fuzzer websocket processor via the Fuzz dialog box for websockets by selecting the menu item below.

Select any text and right click to get the Fuzz… option.

You will get the Fuzzer dialog box. Go to the Message Processors tab. and click on the Add button.

And you will find the dialog box where you can specify your Fuzzer WebSocket Processor.

HttpSender Scripts​

HttpSender scripts allows you to modify any outgoing requests and incoming responses. If we want to add a token in the header for authentications purposes, we can modify every outgoing request or to change the text of every incoming response. They are executed during spidering, or sending a manual request. They are executed before Authentication scripts (if using Script based authentication) for requests and they are executed after Authentication scripts for responses, depending on certain conditions. Don’t forget to enable them first.

To find out more of the function(s) and their argument(s), you can look at the Java script interface: https://github.com/zaproxy/zaproxy/blob/main/zap/src/main/java/org/zaproxy/zap/extension/script/HttpSenderScript.java

Go to Part 2

Leave a Comment

Your email address will not be published. Required fields are marked *