
CICD with Owasp Zap, Docker and Pipeline Scripting (Part 1)
If you have ever struggled with integrating Owasp Zap into your CICD pipeline using Jenkins pipeline scripting, this blog post is for you.
Prerequisites:
- Jenkins with the suggested plugins + Docker, Git Client, Workplace cleanup plugins
- Git and Docker installed on the Jenkins server
- Jenkins set up to be able to use docker in its build jobs.
- Some understanding of pipeline scripting.
- Docker and basics of Docker user defined networking
- Zap 2.10
Some suggested links/advice to help you out if you don’t have all the prerequisite knowledge
- Search for pipeline as code in Udemy to find courses on Jenkins pipeline as code, for example.
- https://docs.docker.com/network/bridge/#manage-a-user-defined-bridge
The Setup
The pipeline script will be using the declarative pipeline syntax and not the scripted pipeline syntax. Also, we will be making use of a Github repository that will contain the files that we want to customize the owasp zap docker image that we will be using. The Github repository is at https://github.com/augmentonesecurity/dvwa_owasp_zap_config.
The high level overview of what we will be doing is to set up a build job that uses Zap to do a baseline test of the Damn Vulnerable Web Application (DVWA) and generate a report. Let’s first take a look at what is in the Github repository:
- scripts/authentication/DVWA Auth.js
- Default_Context.context
- Dockerfile
- config.xml
- log4j2.properties
Some of these files will be overwriting the files that comes in the zap2docker-stable image which is what we are using. Let’s go through them one by one.
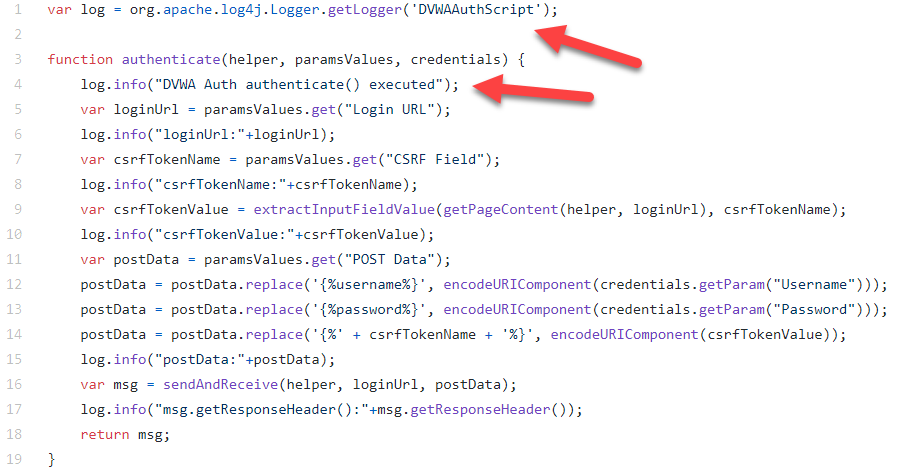
scripts/authentication/DVWA Auth.js
If you have used Zap Desktop UI to create your authentication script, this is the same script that you will be using but with some things you need to take note of. As we will be using Zap in daemon mode, we will no longer have the Script Console in the Zap Desktop UI to tell us that the authentication script is being executed so we will need to determine that in zap.log. We have added in logging statements that will log directly to zap.log. Some logging statements like log.info(“postData:”+postData) can be removed in the final pipeline script as it contains the username and password but for debugging purposes, you can check in zap.log that your authentication script has the right information.
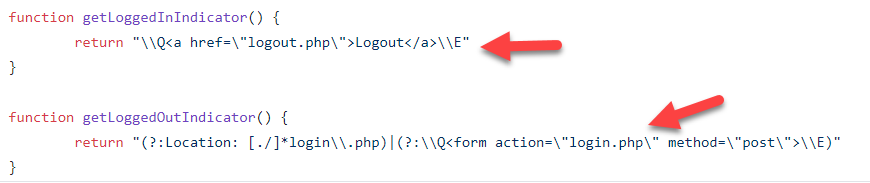
Another thing to take note is that the authentication script is of version 2 which means that you will need to define the getLoggedInIndicator() and getLoggedOutIndicator() functions in the script. A good online tool to escape strings is https://www.the-art-of-web.com/javascript/escape/ . You can use the AddSlashes function.
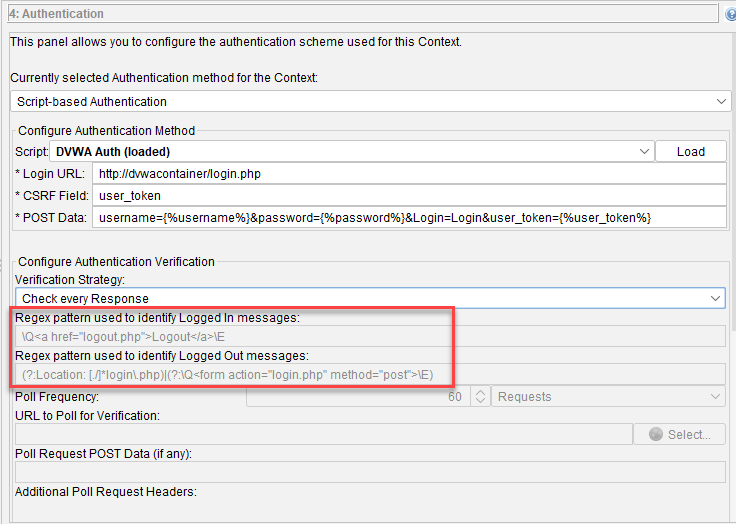
You used to define them in the Authentication section of the Session Properties dialog box but in V2 of the authentication script, they will be greyed out.
Default_Context.context
Default_Context.context is the file you get when you export out the Context from the Zap Desktop UI. You can open it up in a text editor. When you are using Zap Desktop UI, you will usually use localhost to point to the local installation of your target application but because we will be using user defined networking in docker, we will be using the docker container name as the hostname so we will have to rename localhost to dvwacontainer which is what we are using in the pipeline script. Take special note that we did not specify the port number here as dvwacontainer was set up to use port 80 as its container port, not the host port that maps to the container port 80. This is because when 2 or more container is connected to the same user defined network, you can connect to them using the container port.

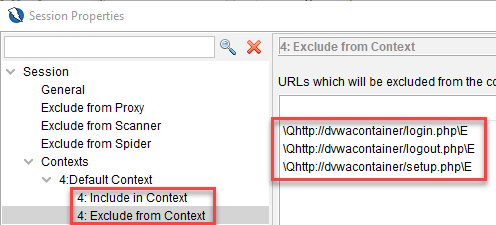
Another thing to take note is your login url. If it used to be localhost, then it needs to be updated to dvwacontainer as shown below, before you export out the context.
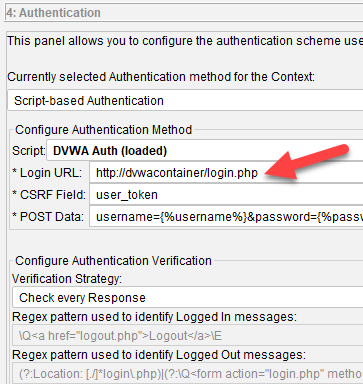
You will not be able to edit this part in Default_Context.context as its encrypted.

Dockerfile
As mentioned before, if you want to be able to transfer files easily between jenkins workspace and the /zap/wrk directory of the zap container, jenkins user and zap user needs to be of the same user id and group id. In order for this to happen, we will need to build an image on top of owasp/zap2docker-stable. Let’s go through each section of the Dockerfile.
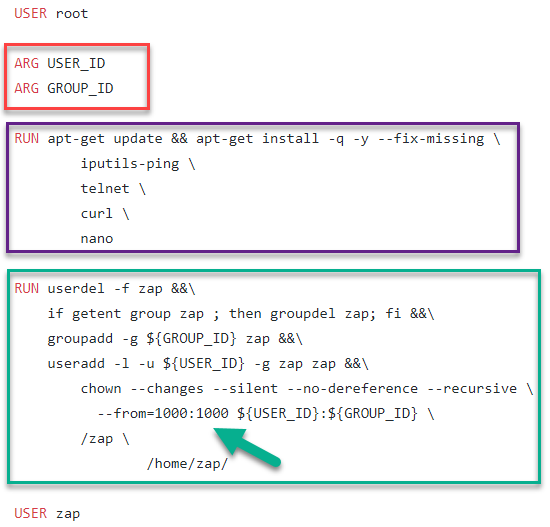
First we start off as user root.
Then, in the red box, we have declared that USER_ID and GROUP_ID are going to be variables that store arguments to the ‘docker build’ command. What they represent are the user id and group of the jenkins user.
In the purple box, we are just updating the libraries and also installing some tools that we might find useful for troubleshooting.
Now, in the green box, what this does is we delete the existing user (user id:1000) and group (group id:1000) ‘zap’, add in the same user and group ‘zap’ but with new user/group ids which is the jenkins user/group ids. After that, we do a chown of all files/directories from /zap and /home/zap as they were still owned by the old zap.
And then we set the user to be zap again
config.xml
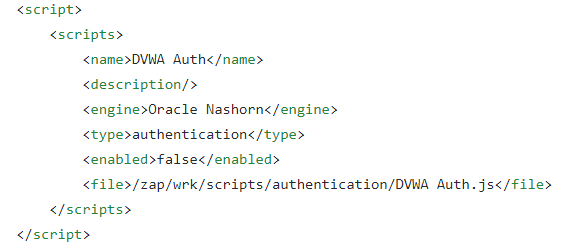
This file is the same file that you will find in your zap home directory but this file is taken clean from the zap container build from the image owasp/zap2docker-stable. The only difference is the addition of the scripts section. This will instruct Zap to load this file as an authentication script. Note that it is specified to be located in /zap/wrk which is going to be mapped to the jenkins build job workspace where we check out this Github repository.
log4j2.properties
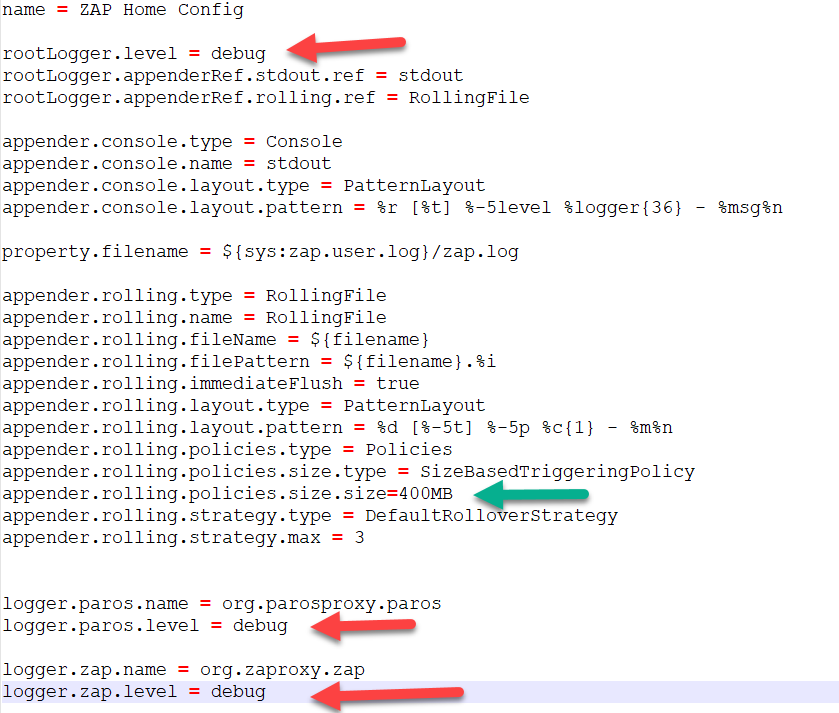
This log4j2.properties file will be overwriting the one in the zap container. The changes basically sets the log level to DEBUG (red arrow) so that you can see more of what Zap is doing. If this is not necessary to you then you don’t need to replace the log4j2.properties in the zap container. Now the other change is setting the max file size (green arrow) to be much larger so that we capture everything in one single file and there will be no longer file rotation. This is so that we can copy this zap.log file inside the zap container from the /home/zap/.ZAP/ to /zap/wrk so that we can access it in the jenkins workspace after the build job is finished for diagnostic purposes if need be.
Go to Part 2