Owasp Zap API Scanning with Authentication From Desktop to Docker (Part 1)

Owasp Zap API Scanning with Authentication From Desktop to Docker (Part 1)

This tutorial shows you how to set up Desktop Zap for API Scanning with authentication and then how to migrate from that to the packaged API Scan in Docker. Please take note that the authentication in this tutorial uses Authorization Code Flow and from the perspective of the client application. The Resource server is the target of Zap. This is different from https://augment1security.com/authentication/oauth2-authorization-code-flow-authentication-using-owasp-zap-part-1/ where the client web application was the target of Zap.

Prerequisites:

  • A linux environment when using docker Zap (We used Amazon EC2 Linux). For desktop Zap, no prerequisite but we used windows.
  • Java 1.8 or higher
  • Maven (https://maven.apache.org/download.cgi
  • Git installed in the linux environment
  • Docker installed in the linux environment
  • Owasp Zap 2.9 (python scripting addon, openapi addon installed from marketplace)
  • If you need to visually see how the Authorization Code Flow is like, this link – https://auth0.com/docs/flows/concepts/auth-code will help.
Note: Before we begin, I want to highlight that there is an alternative way to do api authentication outside of Zap before doing the actual api scanning via Zap if it suits your needs – https://www.zaproxy.org/blog/2017-06-19-scanning-apis-with-zap/

The Setup

The high level overview of what we will be doing is setting up the authorization server and resource server and having Zap pointing to the resource server together with the required scripts for authentication. There are 2 Github repositories that we will be using. The first repository holds the source code for the authorization server and resource server. It is found here – https://github.com/augmentonesecurity/oauth2_auth_resource_servers

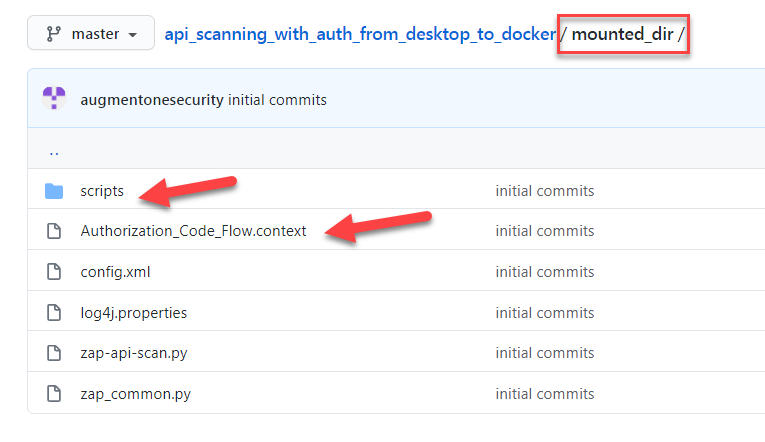
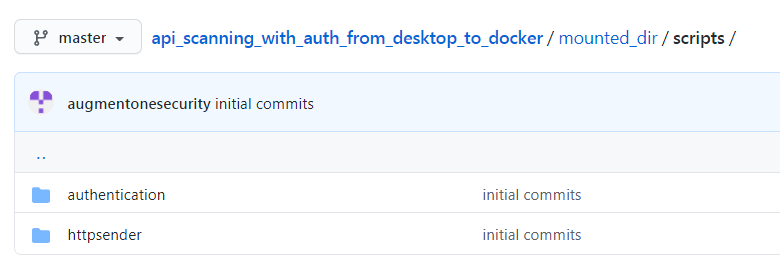
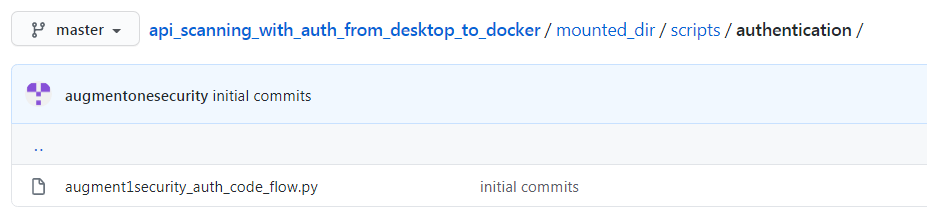
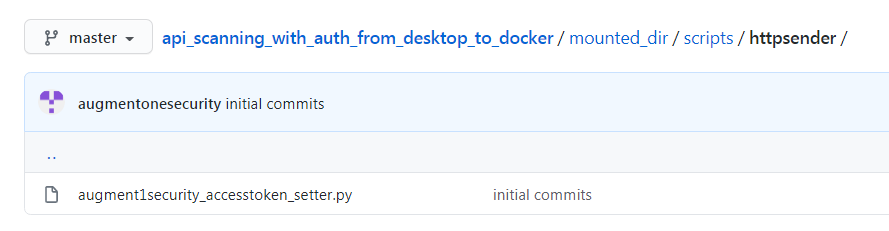
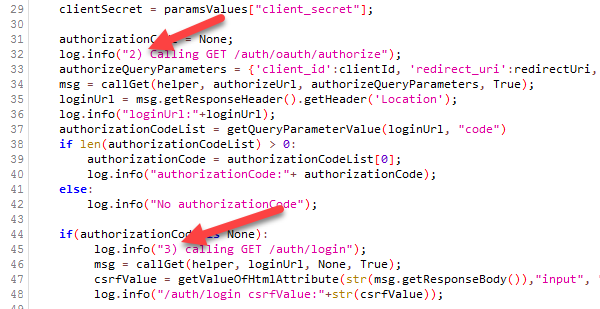
The second repository holds the authentication scripts, slightly modified versions of the python scripts found in the dockerized Zap and other configuration files that will be needed to make things work. The second repository can be found here – https://github.com/augmentonesecurity/api_scanning_with_auth_from_desktop_to_docker

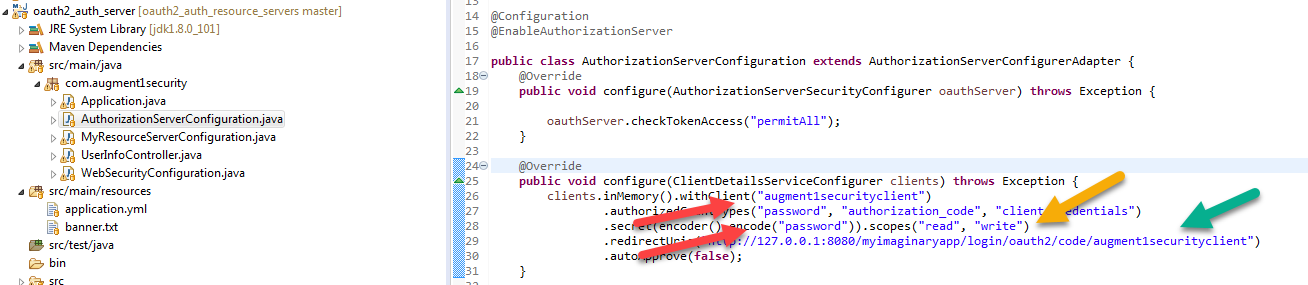
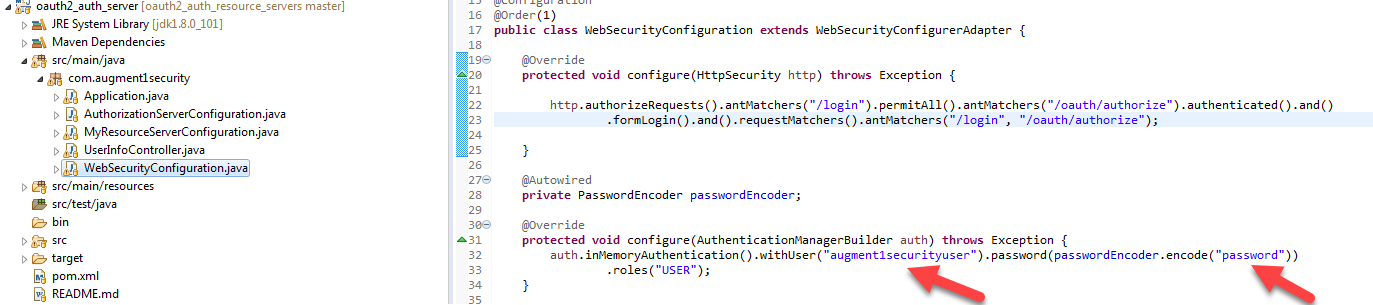
Let’s take a look at what is in the first repository.

oauth2_auth_resource_servers

This repository contains 2 folders, auth_server and resource_server. As their names suggest, one folder contains the maven project for the authentication server and the other folder contains the maven project for the resource server that hosts the Rest API we want to target. You can go into each of them in separate DOS/terminal windows and execute mvn spring-boot:run to start them up. But we will do that later.

Now let’s take a look at what’s in the second repository that is relevant to what we will be using in desktop Zap. If you go into the mounted_dir (red box) directory, the files/directory that we need to use for desktop Zap are pointed by the red arrow. Authoization_Code_Flow.context is the context file that we will be importing into desktop zap. We shall take a look at that later.

Now, when we go into the scripts folder, we see 2 sub-directories. authentication directory contains the main authentication script ( augment1security_auth_code_flow.py) which will run against the authentication server mentioned previously and in the httpsender directory, we have augment1security_accesstoken_setter.py which will attach the access_token, if it exists, to all the api calls made to the resource server.

Now, let’s start up desktop Zap and add the 2 scripts to it. 
Once Zap is launched, ensure that you already have the Python scripting and openapi addon installed (shown below).

In the Scripts tab, right click and select New Script

And fill in the dialog box as shown below and click on Save. Copy the contents of augment1security_auth_code_flow.py in the github repository into the new script file.

Right click on the augment1security_auth_code_flow.py entry in the Scripts tab and save the file.

Before we add the second script to Zap, I just want to point out a few things about the augment1security_auth_code_flow.py script. Instead of using print() to print to the Script console, we are using java logging to log to zap.log as shown below. You can convert them to using print() when using desktop Zap but you will need to convert them back when you are using docker Zap so that the logging statements can be seen in zap.log for troubleshooting purposes as there is obviously no UI in dockerized Zap.

You will notice that I have prefixed certain log statements with an index number (red arrow). This corresponds as closely as possible to the steps shown here – https://medium.com/@darutk/diagrams-and-movies-of-all-the-oauth-2-0-flows-194f3c3ade85

You will also see index numbers 5a, 5b, 5c but they are all part of step 5 in the diagram in the link above. There additional comments in the script that I hope will help you understand what the script is doing. Basically, it is just performing the authorization code flow steps to get the access token to send as part of the api calls to the resource server.

Now, lets add the httpsender script to Zap. Right click on Http Sender in the Scripts tab and select New Script…

Fill in the details as shown below and click on Save

Copy the contents of the augment1security_accesstoken_setter.py in the Github repository and paste it into this new script. Don’t forget to save it as shown the same for augment1security_auth_code_flow.py above. Please read the comments in the script to understand how it works. Note also to enable the script. Very important step. If we do not enable the script, the access token will not be added as a query parameter to each url and thus will api calls to the resource server will fail. We enable the script as shown below.

Now let’s import the Authorization_Code_Flow.context file into Zap but first let’s delete the current one first.

Import the context file by clicking on this button and selecting Authorization_Code_Flow.context.

Let’s now go through what is in the context. Take note that the url to include in context uses 127.0.0.1 instead of localhost. This is needed when we are using docker. As Zap inside the docker container needs to connect to the authorization and resource servers in the host machine, the docker flag –network=hostwill be passed to the docker command when starting up the container in the zap-script.sh . We will cover that later.

Now, let’s take a look at the Authentication section.

  1. We have chosen Script-based authentication. The script chosen is augment1security_auth_code_flow.py.
  2. Note that all urls use 127.0.0.1 instead of localhost for the same reason mentioned before.
  3. Both the authorize_url and token_url points to the authorization server at port 8081
  4. Scope values must be included the scopes defined in AuthorizationServerConfiguration.java file in the auth_server maven project (second screenshot below, yellow arrow).
  5. The redirect_url is doesn’t exists. It is just a filler value but be aware that it needs to be the same as what is specified in the 
  6. AuthorizationServerConfiguration.java file in the auth_server maven project (second screenshot below, green arrow).
  7. state can be any random value you want.
  8. client_id and client_secret values must be the same as what is set in the AuthorizationServerConfiguration.java file in the auth_server maven project (second screenshot below, red arrow)
  9. Regex pattern for logged in and logged out response messages are greyed out as the are defined as getLoggedInIndicator() and getLoggedOutIndicator() in the augment1security_auth_code_flow.py file.

Now let’s take a look at the Users section. We have a user defined with ID 68. Take note of this id number, we will be using that in the zap_common.py file.

Double click on the entry and you will see that the username and password must be the same as the username and password specified in the WebSecurityConfiguration.java file in the auth_server maven project (second screenshot below, red arrow)

Now in the Forced User section, ensure that the user is selected.

Go to Part 2

1 thought on “Owasp Zap API Scanning with Authentication From Desktop to Docker (Part 1)”

  1. My my my, where have you been all my life.

    This is literally the missing link between being able to just use zap effectively and to do it with cli/actions, the way it needs to be done.

    Thank you so much, we’ve been pulling our hair out to work out how to design our DAST and Fuzz design workflows and now we have a clear picture.

    Much respect
    b

Leave a Comment

Your email address will not be published. Required fields are marked *