OAuth2 Authorization Code Flow Authentication Using Owasp ZAP (Part 2)

OAuth2 Authorization Code Flow Authentication Using Owasp ZAP (Part 2)

Go to the Users section and click on the Add button to add in a dummy user. This is so that we can select a user when we are spidering that will cause Zap to execute the authentication script but the dummy user will not be used as the user that is used to login is already hard coded in apiAuthEndpointRequestBody parameter in the Authentication section

After the user is added, go to the Include in Context section to add in the url to include in the context.

Key in \Qhttp://localhost:8090\E.* and click on the Add button.

Click on the OK button of the Session Properties dialog box to save the settings.

The Spider Scan

Open up the Spider tab (pointed by green arrow) if you haven’t already done so by clicking on the + button (pointed by red arrow). Click on New Scan button (pointed by purple arrow) to launch the Spider dialog box

Click on the Select button and select the current context.

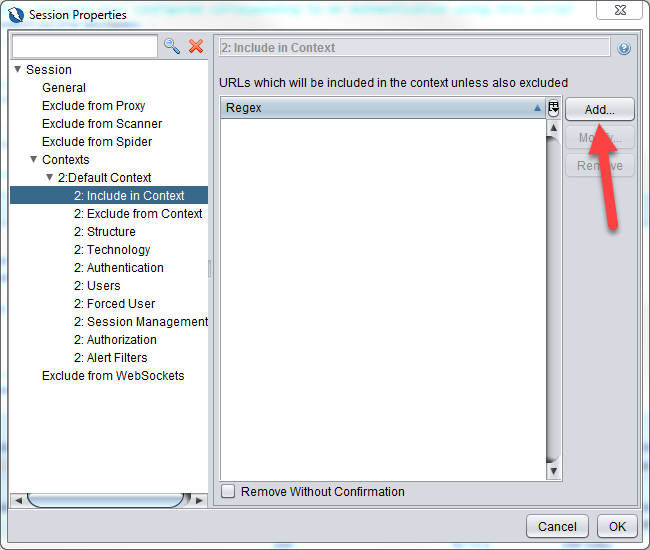
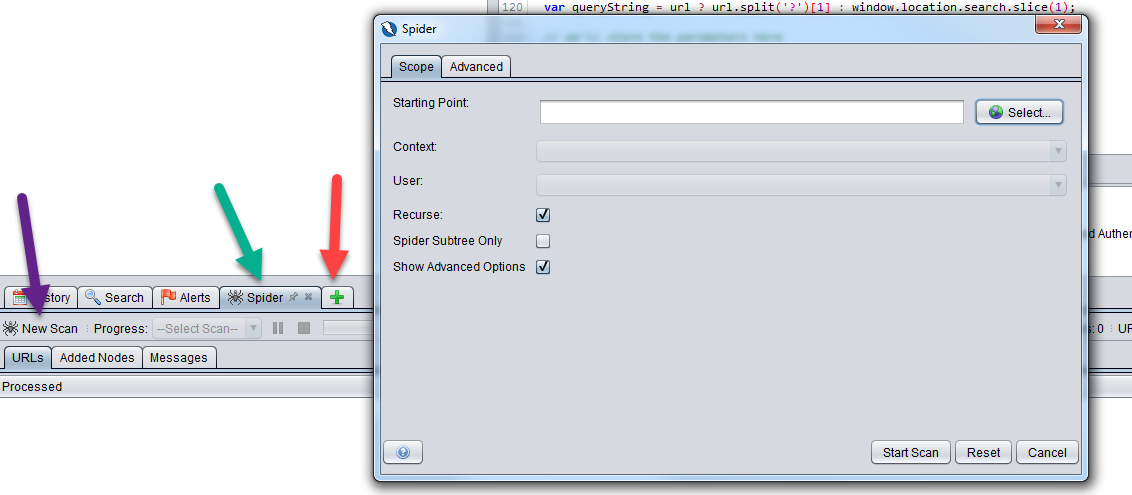
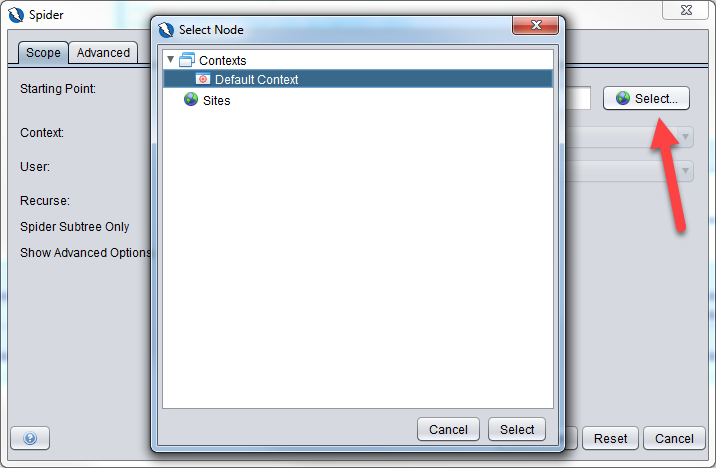
Once you have selected the default context for the Starting Point parameter, the Context parameter will be automatically selected. (After the first spider scan, you can select http://localhost:8090 as the Starting Point as the web application had been spidered before)

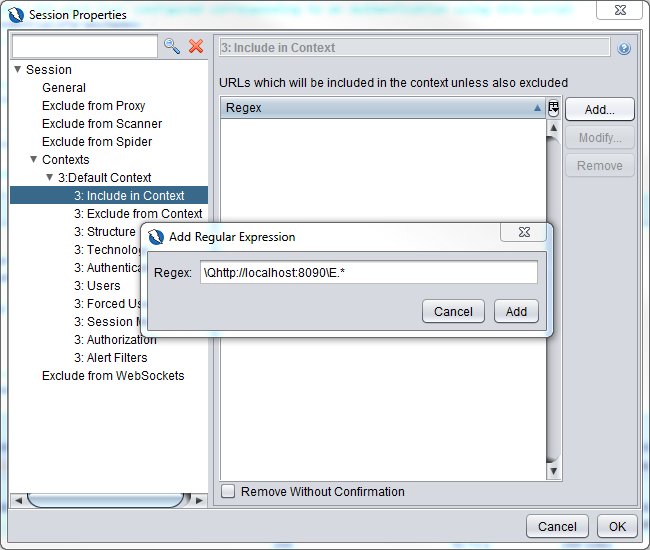
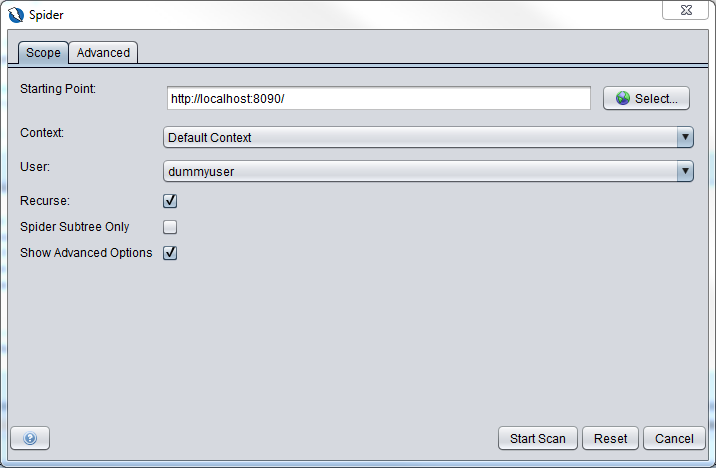
Now go back to the Starting Point parameter and key in http://localhost:8090

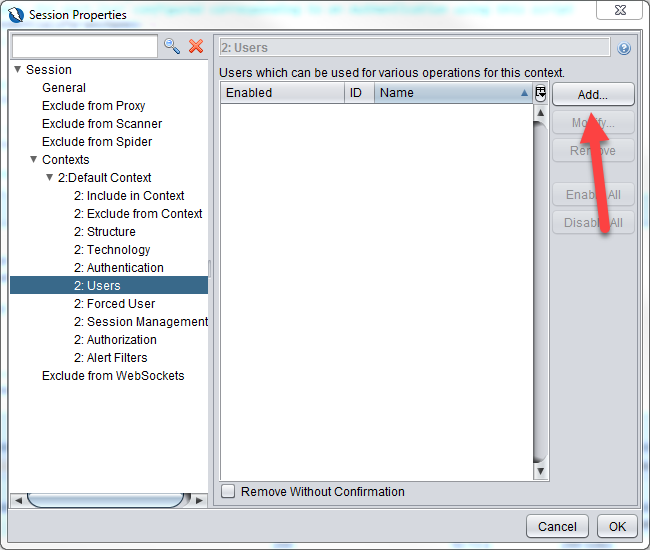
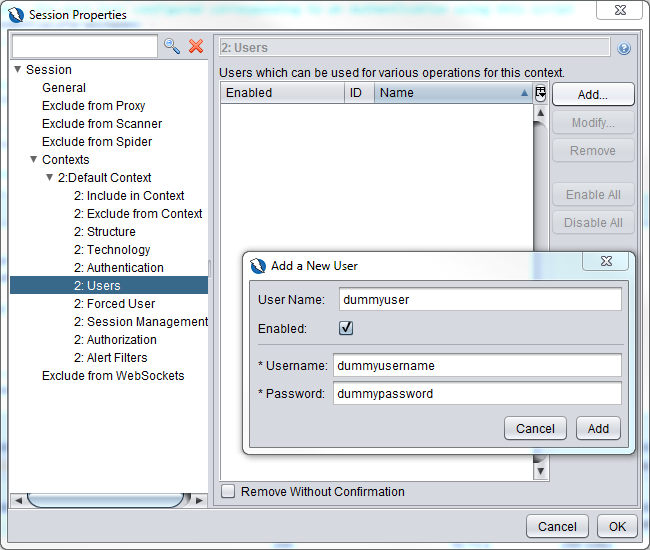
Select dummyuser as the User that we created above.

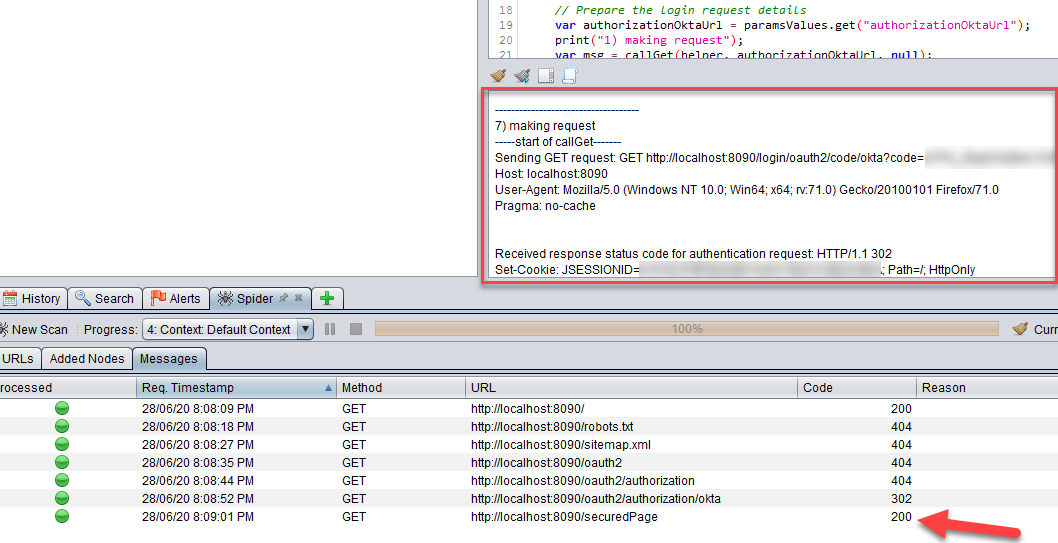
Click Start Scan button

You will find the output of the authentication script in the script console window highlighted by the red box

You will also find that once the http call to http://localhost:8090/securedPage is a http status code 200 and not 302, your authentication is successful.

However, if you open up the Output tab, you will find messages that say Authentication failure but that is because we put in anything as the logged in indicator. This Spring web based application is not a full fledged application so there is no text to indicate whether it is logged in or logged out unlike in a real world application.

Troubleshooting tips

If you are having trouble with your authentication script, what you can do is to go to API->System Log in the Okta developer dashboard and view the logs that is generated for each call made to Okta.

And you can expand each event to show further details

Leave a Comment

Your email address will not be published. Required fields are marked *